Gameplay Using Event Handlers
Welcome to the final installment in our five part series on custom scripting with AcceleratXR. So far we’ve learned how to work with the Script Manager extension for Visual Studio Code, extend the REST API, implement custom data types and write background jobs for post processing of data
Today’s article will cover how to implement asynchronous and semi-real-time gameplay using event handlers.
In the last article we created a background service to regenerate a players health over time. For this week we’re going to instead react to certain events to trigger a full replenishment of the player’s health. Specifically, any time the player completes a quest or logs in their health will be fully replenished.
Before we dig into the code let’s take a closer look at the telemetry and event system for those of you unfamiliar. The telemetry services system is responsible for managing all event data in the AcceleratXR platform. Game clients as well as servers and other backend services all send events to this service in order to provide tracking of useful information. Some of this data is purely for record keeping and offline player analysis while other data is intended to be acted upon by other systems. Each event that arrives is broadcasted to the entire rest of the platform so that they can be processed via event handlers. These event handlers make it possible to process event data in real-time and serves as the foundation for important gameplay features such as the questing system or the progression system.
Each telemetry event contains a set of common data as well as data specific to that single event as defined by you, the game developer. You can review these properties here.
For our example we are going to replenish a characters health and mana each time their user logs in. Whenever a user logs in, the platform generates a UserLogin event. Since each event contains a userId property referring to the originating user of the event we can leverage this to find the character in question.
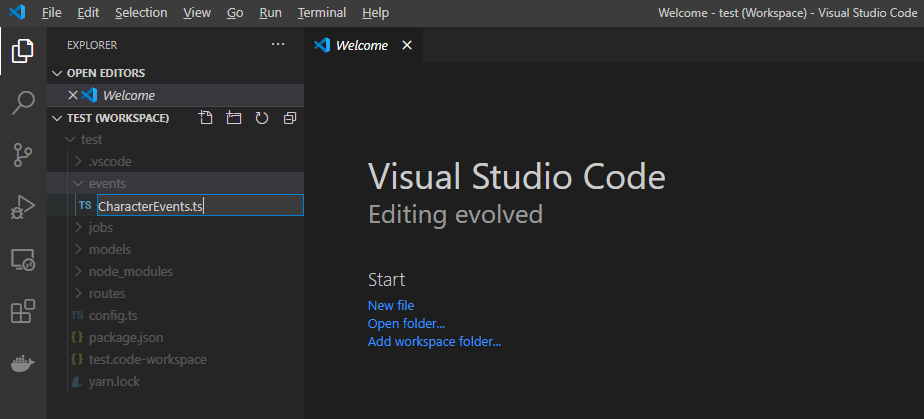
Let’s get to the code. To get started you’ll need to open up your test workspace in Visual Studio Code that you created in part one. Now let’s create a new file for our code called CharacterEvents.ts.
In order for event handlers to be properly constructed and registered your script file must export a default class that the service will instantiate automatically. Like our background service that we created in last week’s article the class also has a repo property which will be automatically injected for us.
1export default class CharacterEvents {
2    @MongoRepository(Character)
3    private repo?: Repository<Character>;
4}
In AcceleratXR, an event handler is any function decorated with the @OnEvent decorator. The function must always take a single argument containing the data of type Event. Since this example is interested only in user logins the event type that the handler will be registered for is UserLogin. There are no limitations to how many event handler functions you can define in a class. If you define multiple functions that respond to the same event note that there is no guarantee in which order they will execute in and you should assume they will execute in parallel.
 1@OnEvent(“UserLogin”)
 2private async regenHealthAndMana(evt: Event): Promise<void> {
 3    const character: Character | undefined = await this.repo.updateOne(
 4        { userUid: evt.userId },
 5        {
 6            $set: {
 7                health: MAX_HEALTH,
 8                mana: MAX_MANA,
 9                dateModified: new Date()
10            },
11            $inc: {
12                version: 1
13            }
14        });
15}
Once an event comes in of the desired type we do a simple MongoDB update operation to reset the health and mana properties of the character, using the event’s userId as the identifying key of the character to update. We also make sure to set a new dateModified and increment the version counter for our optimistic lock. Pretty simple.
So let’s quickly expand this example to support any UserLogin event as well as any quest completion. Any time a quest is completed by a player the questing system generates a QuestComplete event. Again since all events must contain a userId of the originating user we can again use this to retrieve the corresponding character. Therefore no actual code changes are required to the body of our function.
As a matter of convenience so that you don’t have to duplicate your code multiple times for each event handler the OnEvent decorator can take either a single string or a list of strings for the event types to handle. Therefore the only change we need to make for this to work is to convert the name of the event type to an array containing both UserLogin and QuestComplete.
 1@OnEvent([“UserLogin”, “QuestComplete”])
 2private async regenHealthAndMana(evt: Event): Promise<void> {
 3    const character: Character | undefined = await this.repo.updateOne(
 4        { userUid: evt.userId },
 5        {
 6            $set: {
 7                health: MAX_HEALTH,
 8                mana: MAX_MANA,
 9                dateModified: new Date()
10            },
11            $inc: {
12                version: 1
13            }
14        });
15}
In addition to being able to define multiple event types you can even use regular expressions to more easily match multiple events. In fact our example can easily be rewritten to use a single regex string instead (@OnEvent(“UserLogin|QuestComplete”)).
While it is also possible to define a catch all @OnEvent(“.*”) that would respond to any event the system generates we strongly don’t recommend you try it. Also be careful what additional actions your handler code may cause so that you don’t create infinite loops. It’s easier to do than you think.
Your final code should look like the following.
 1import { MongoRepository, OnEvent } from “@acceleratxr/service-core”;
 2import { Event } from “@acceleratxr/core”;
 3import { MongoRepository as Repository } from “typeorm”;
 4import Character from “../models/Character”;
 5
 6const MAX_HEALTH: number = 100;
 7const MAX_MANA: number = 100;
 8
 9export default class CharacterEvents {
10    @MongoRepository(Character)
11    private repo?: Repository<Character>;
12
13    @OnEvent([“UserLogin”, “QuestComplete”])
14    private async regenHealthAndMana(evt: Event): Promise<void> {
15        const character: Character | undefined = await this.repo.updateOne(
16            { userUid: evt.userId },
17            {
18                $set: {
19                    health: MAX_HEALTH,
20                    mana: MAX_MANA,
21                    dateModified: new Date()
22                },
23                $inc: {
24                    version: 1
25                }
26            });
27    }
28}
That’s it! You’ve now mastered all aspects of custom scripting with AcceleratXR. Go forth and make a great game!