Extending the REST API
Welcome to the second installment of our series on custom scripting using the AcceleratXR Live Scripting System. In part one we covered the AcceleratXR Script Manager and how to create a workspace, sync scripts and work in Visual Studio Code.
This article will focus on extending the platform REST API by creating entirely new endpoints that titles can access to enable custom behavior, new data storage access and more.
AcceleratXR is built upon the open source project ComposerJS. ComposerJS is a generalized framework for creating RESTful API services using NodeJS. One of Composer’s core design principles is to enable rapid development with minimal setup and configuration. As such, each service scans for source code on the running server’s disk, automatically importing and activating that code at startup. This capability dramatically simplifies the development process, reducing the time and difficulty needed to develop the server code. The Live Scripting System has re-imagined this core functionality by pulling source code from a database, in addition to scanning the local disk. Combined this makes it possible to develop all of the source code needed for any kind of new platform functionality without ever having to fork, commit or deploy an AcceleratXR micro-service project directly.
In AcceleratXR there are four primary types of scripts. They are…
Background Jobs
Data Models
Event Handlers
Route Handlers
This article focuses on the fourth type. A Route Handler is a class decorated with @Route that contains decorated functions capable of processing different kinds of HTTP requests.
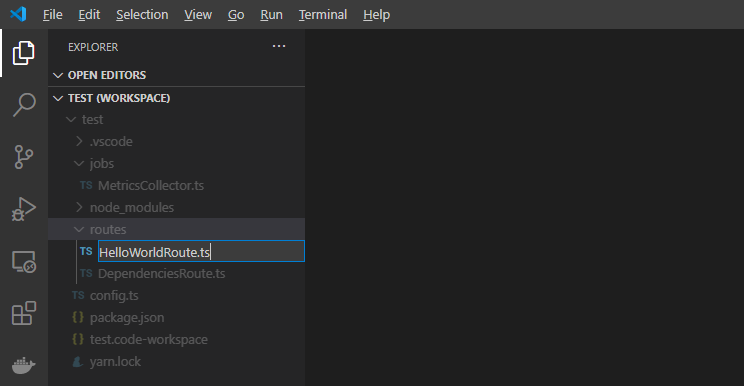
For this example we will make a simple route handler that responds to the HTTP request GET /helloworld. To get started open the workspace you created in Part One. Now create a new file and call it HelloWorldRoute.ts. Note it is recommended to place your script in the routes sub-folder.
The first thing we need to do is define the class structure of the route handler. This will look like the following.
1import { RouteDecorators } from “@acceleratxr/service-core”;
2const {
3    Route,
4} = RouteDecorators;
5
6@Route(“/helloworld”)
7export default class HelloWorldRoute {
8}
Next we need to define the actual handler function that will process GET requests. This is done by creating any function with the @GET decorator.
 1import { RouteDecorators } from “@acceleratxr/service-core”;
 2const {
 3    Get,
 4    Route,
 5} = RouteDecorators;
 6
 7@Route(“/helloworld”)
 8export default class HelloWorldRoute {
 9    @Get()
10    getHelloWorld(): string {
11        return “Hello World!”;
12    }
13}
In the above example you’ll notice that we return a string as the function result. This string will be output to the end client in a JSON encoded format. Go ahead and save the script, then publish it to activate. Once published you can access the new endpoint immediately from your browser.

Congratulations! You’ve just created your first new REST API endpoint in AcceleratXR. Now let’s try something a bit more complicated. What if we want to greet the user instead, based on an id passed in via a URL parameter. Let’s say something like GET /hello/sam. We can do this by modifying our route handler as follows.
 1import {
 2    RouteDecorators
 3} from “@acceleratxr/service-core”;
 4const {
 5    Get,
 6    Param,
 7    Route,
 8} = RouteDecorators;
 9
10@Route(“/hello”)
11export default class HelloWorldRoute {
12    @Get(“/:id”)
13    getHelloWorld(@Param(“id”) id: string): string {
14        return `Hello ${id}!`;
15    }
16}
The first thing to notice is that we changed the path from /helloworld to just /hello at the class level. This tells the server that this route handler will handle all requests starting with the path /hello. Second, we’ve added a sub-path to the @GET decorate /:id. The :id tells the server that this is a parameterized path. Lastly, we’ve also added a single function argument, id with the decorator @Param. This tells the server that it needs to parse the request path for a parameter of the given name, id, and pass the value as an argument to this function. Now we return a new string containing the passed in name from the request path. Save and publish your script again and try it in your browser.

The next thing you may be wondering is how you identify users making requests. This is as simple as adding a new function parameter decorated with @User. For example, let’s create a new function that uses the authenticated user’s first name instead.
 1import {
 2    RouteDecorators
 3} from “@acceleratxr/service-core”;
 4const {
 5    Get,
 6    Param,
 7    Route,
 8    User,
 9} = RouteDecorators;
10
11@Route(“/hello”)
12export default class HelloWorldRoute {
13    @Get(“/:id”)
14    getHelloWorld(@Param(“id”) id: string): string {
15        return `Hello ${id}!`;
16    }
17
18    @Get()
19    getHelloUser(@User user?: any): string {
20        if (user && user.firstName) {
21            return `Hello ${user.firstName}!`;
22        } else {
23            return “Hello Guest!”;
24        }
25    }
26}
The new function, called getHelloUser, has a single parameter for the authenticated user. We are expecting that the authenticated user has a property firstName that we can use to display in the response (although this is not guaranteed). If a user is not authenticated we simply call them Guest. Let’s try this one in the browser with no authentication.

Next let’s try it with an authenticated user. We’ll pass in the authentication token using the jwt_token query parameter.

The last item we’ll cover here is how to deal with a content body. This is handled pretty simply by adding a single argument to the function parameter of type any. Since ComposerJS is a JSON based framework, HTTP requests that send in JSON objects will already be parsed once passed into the function, saving you time and difficulty. Similarly, if you return an object back from your route handler function the server will automatically encode the result as JSON when returning to the client.
 1import {
 2    RouteDecorators
 3} from “@acceleratxr/service-core”;
 4const {
 5    Get,
 6    Param,
 7    Post,
 8    Route,
 9    User,
10} = RouteDecorators;
11
12@Route(“/hello”)
13export default class HelloWorldRoute {
14    @Get(“/:id”)
15    getHelloWorld(@Param(“id”) id: string): string {
16        return `Hello ${id}!`;
17    }
18    @Get()
19    getHelloUser(@User user?: any): string {
20        if (user && user.firstName) {
21            return `Hello ${user.firstName}!`;
22        } else {
23            return “Hello Guest!”;
24        }
25    }
26    @Post()
27    postMessage(obj: any): any {
28        return obj;
29    }
30}
In our above example we’ve defined a new function, postMessage, that handles requests of type POST. It expects a content body that will be parsed as the objargument which will then be returned as the response. Since we know the server will encode objects for us we expect our response to be encoded in JSON.
Since we can’t easily send a POST request using a browser we’ll try this one out using the curl command line utility.

You’ll notice that we sent a JSON encoded string and received a properly formatted JSON string in return. We could alternatively modify the code to return only the msg portion of the object and we’d get back a string like in the previous examples.
Now that we’ve gone over all the basics make sure to read more about all the different ways you can construct route handlers on the ComposerJS website.
In part three we’ll discuss creating data models and how to expose simple CRUD access between the database and a custom REST API.